The first mission in Deus Ex takes places on Liberty Island. In this mission, JC Denton must deal with a terrorist attack on his first day of work. The mission begins and ends at the south dock, and also features a visit to the UNATCO Headquarters on the island.
Summary[]
Goals[]
| Primary | The NSF seem to be directing the attack from the Statue. Get inside and locate the threat. |
| Meet UNATCO informant Harley Filben at the North Docks. He has a key to the Statue doors. | |
| One of UNATCO's top agents is being held inside the Statue. Break him out, and he'll back you up against the NSF. | |
| Primary | Report to headquarters on the west side of the island for a debriefing. |
| Primary | Report to Manderley's office on Level 2. |
| Go to the break room on Level 2 and check in with your partner, Agent Anna Navarre.* | |
| See Sam Carter for equipment.** | |
| See Jaime Reyes for a medical exam.** | |
| Primary | Go back to Manderley's office on Level 2 for the mission briefing. |
| Primary | Go to the South Dock and take the police boat to Manhattan. |
- * Given only if you enter the conference room before reporting to Manderley's office.
- ** Listed as primary goals if either one is completed before reporting to Manderley.
Skill Points[]
| SP | Requirement | Category |
|---|---|---|
| Liberty Island | ||
| 25 | Enter the shed at the SATCOM compound | Exploration Bonus |
| 50 | Enter the antenna shaft at the SATCOM compound | Exploration Bonus |
| 150 | Meet Harley Filben at the north dock (secondary goal) (Must be done before completing the primary goal) |
|
| 50 | Enter the sunken boat at the north dock | Exploration Bonus |
| 250 | Pass the electric hazard in the bunker to the east of the statue | Exploration Bonus |
| 150 | Free Gunther from the NSF (secondary goal) (Must be done before completing the primary goal) |
|
| 150 | Reach the stairs to the second-highest level of the statue | Progress Bonus |
| 750 | Reach the top level of the statue (the destination of the primary goal) | Critical Location Bonus |
| 115 | Report to the headquarters and reach the interior of the building | Progress Bonus |
| Subtotal (Liberty Island): 1690 | ||
| UNATCO Headquarters | ||
| 250 | Visit Manderley's office on Level 2 | Critical Location Bonus |
| 50 | Enter JC Denton's office | Area Location Bonus |
| 50 | Visit Jaime Reyes' medical center | Subject Acquisition Bonus |
| 50 | Visit Sam Carter's armory | Area Location Bonus |
| Subtotal (Headquarters): 400 | ||
| Mission Total: 2090 | ||
Map segments[]
| Map Name | Map File | Map-Start Message |
|---|---|---|
| NYC - Liberty Island | 01_NYC_UNATCOIsland | Liberty Island, New York UNATCO HQ |
| NYC - UNATCO HQ | 01_NYC_UNATCOHQ | UNATCO HQ United Nations Antiterrorist Coalition |
Collectibles[]
Augmentation canisters[]
- Liberty Island
- Microfibral Muscle / Combat Strength – At the top level of the statue, near the NSF commander
Weapon modifications[]
- Liberty Island
- Scope – Sold by Tech Sgt. Kaplan for 700 credits (Kaplan is outside the UNATCO headquarters)
- Accuracy – Inside a crate in the sunken boat at the north dock
- Reload– Inside a crate in the sunken boat at the north dock
- Laser – In the bunker to the east of the statue, past the electrical hazard
- Clip – In the bunker to the east of the statue, past the electrical hazard
- Accuracy – On a table near Gunther's holding cell
- UNATCO Headquarters
- Accuracy – In a locked office at the west end of the hallway on level 1
- Scope – Under the movable floor tiles in Alex Jacobson's office. These floor tiles are at the east side of the room opposite to the door with the keylock.
Maps[]
")
.png)
Brief walkthrough[]
The mission begins at the south dock. Speak with Paul Denton, who offers you a choice among three weapons. The GEP gun is likely the best choice because it is useful for destroying turrets, robots, and locked doors, and cannot otherwise be obtained until the third mission. The other two weapons that you may choose from (the sniper rifle and mini-crossbow) can be looted from nearby enemies in this mission.
Head to the north dock to meet with Harley Filben to complete the first secondary objective. If you promise Harley that you will not kill the NSF commander, he will provide the key to the front door of the Statue of Liberty complex.
The front door is only one of two ways to get into the statue complex. The alternative method is to climb a stack of crates at the back (east) side. Once inside, complete the other secondary objective by freeing Gunther Hermann, who is being held on the lobby level (bottom level) of the compound. Then, to complete the primary goal, head to the top level of the statue to interrogate the NSF commander Leo Gold. Choosing the second dialogue option will cause him to surrender without becoming hostile. The first augmentation canister of the game is found near the NSF commander. At this point, UNATCO will take over the entire island, neutralizing any remaining hostiles.
Three areas in the periphery of the statue provide exploration bonuses as well as loot:
- The satellite communication (SATCOM) compound near the UNATCO Headquarters – Enter the shed (code 0451) and the locked antenna shaft nearby to receive the exploration bonuses.
- A sunken boat at the north dock – Two weapon modifications and a sawed-off shotgun can be found inside breakable crates inside the boat.
- A storage bunker to the east of the statue – Crossing the electrical hazard inside the bunker will reward you a large exploration bonus, as well as two weapon modifications.
The second part of the mission takes place in UNATCO's underground facility, where you are introduced to your boss, Joseph Manderley, and other UNATCO personnel. The medical bot in the medical bay can be used to heal your injuries and install the augmentation canister. The mission ends when you return to the south dock to board the boat for Battery Park. Once you leave for Battery Park, you will not be able to explore Liberty Island again.
Detailed walkthrough[]
South Dock[]
You begin on the south pier of Liberty Island, equipped only with a Pistol, a Riot Prod, and a Medkit. Alex Jacobson messages you through your infolink and tells you that your brother, Paul Denton, is on his way to meet you on the pier. Move forward and you'll see a figure in a trench coat heading towards your direction. This is Paul, and a conversation will trigger as soon as he's near you.
Paul tells you that the NSF terrorist group has taken over the statue and has taken Gunther Hermann, one of UNATCO's top agents, hostage. Paul offers you to choose one additional weapon for the mission: a sniper rifle, a GEP gun, or a mini-crossbow. Each weapon suits very different tactics. However, the GEP gun is the only weapon that is not otherwise obtainable on this mission. A sniper rifle can be found on an NSF member near the front entrance. NSF members will also carry mini-crossbows.
Once you're armed, Paul informs you that your primary objective is to locate and interrogate the NSF commander, who is probably at the makeshift command center at the top of the statue. Now, look for a crowbar among a stack of crates on the right-hand side of the pier and pick it up. Use it to smash the two nearby wooden crates, in which you'll find a pair of binoculars and a lockpick.
Go down the staircase on the left into the water to find a broken shark cage. Inside the shark cage are two other wooden crates. Smash them both to find a multitool and a bioelectric cell, and climb back out. You can talk to Corporal Collins, who gives you more information on Gunther. You can also talk to Paul two more times to uncover additional information. Keep heading down the dock to find some more wooden crates in the corner. Destroy all of them in order to find 10mm Ammo, a Prod Charger, and some Darts.
Afterwards, proceed up the ramp and take a look around. There is a baton that's on the body of a UNATCO soldier at your feet. Alex will transmit to you a map of the island, so take a look at this to plan your approach. Two guards patrol this area, so either avoid them or get their attention so they will chase you down onto the docks to be eliminated by a friendly Security Bot. These two guards will carry 10mm Ammo and a Combat Knife, which is standard for most of the NSF enemies.
Once both guards are down, head left after the ramp and look for a small metal crate in a storage area. This storage area is to the immediate northwest of the ramp from the south dock. Take the crate and place it next to the large stack of crates left of the path. Jump on top and smash the wooden crate to find a gas grenade. At the storage area, there's an locked panel labeled "U.N.A.T.C.O. Medlab" that houses three medbots. The panel is locked, but using a lockpick here is unnecessary. The panel can instead be opened using any one of crates of TNT to the east of the area. Pick up a TNT crate, and either throw it at the panel up close, or position the TNT crate near the panel and shoot it with your pistol. The unlocked medbots can be used to restore your health whenever you're injured. Keep going down the main path - there are two guards ahead, you can either kill them now or sneak past them to deal with them later. Turn left to arrive at the exterior of the UNATCO HQ.
UNATCO Headquarters exterior[]
At the entrance you'll find Tech Sergeant Kaplan, who triggers a conversation with you. You'll have to make a choice halfway through. Your choice will have a small effect: if you choose the first one, he'll give you the code (0451) to the shed next to the helipad, but he won't give you the code if you select the second option. Afterward, he'll offer you some hardware: a Scope for 700 credits, some 10mm Ammo for 200 credits, or some Tranquilizer Darts for 60 credits. Buy the darts if you're going for a pacifist playthrough, or 10mm if you are going for regular playthrough. At the beginning, you won't have enough credits for the scope, but you can still buy it from him anytime before leaving Liberty Island for the next mission.
When you're done talking to Kaplan, approach the green shed next to the helipad to find a Crowbar and a wooden crate which contains a multitool. There's also a wooden crate that has a Lockpick inside that's behind the shed. A key for the UNATCO Compound Hatch is located in a small gap between the shed and the fence to the right of the lockpick crate. Punch in the code 0451 to open the door to find a Medkit on top of the machines and Tranquilizer Darts on the table. Underneath the table is a datacube which contains the information for the security terminal on the wall (login: SATCOM, password: UNATCO_001). Use the security terminal and use the information (or hack it) in order to unlock the nearby access door to the antenna shaft. Alternatively, the antenna shaft can be accessed using the NanoKey found behind the shed. Entering the shed and antenna shaft will grant you an exploration bonus.
Go back outside and into the access door to find a wooden crate which contains an EMP grenade. Exit the UNATCO HQ and head back to the main path. From here, there are multiple ways to get into the statue.
If you haven't already, eliminate the two guards patrolling the area. The nearest guard carries a Mini-Crossbow equipped with tranquilizer darts. This weapon's sedative effect doesn't affect your movement or coordination but does damage you and it takes a short while to wear off after the initial injury. After he's down, you can search his body for the crossbow. Now, take care of the other guard who's not too far away; he carries the standard loadout: some 10mm Ammo and a Knife.
The datacube. The Statue's Front Entrance is behind.
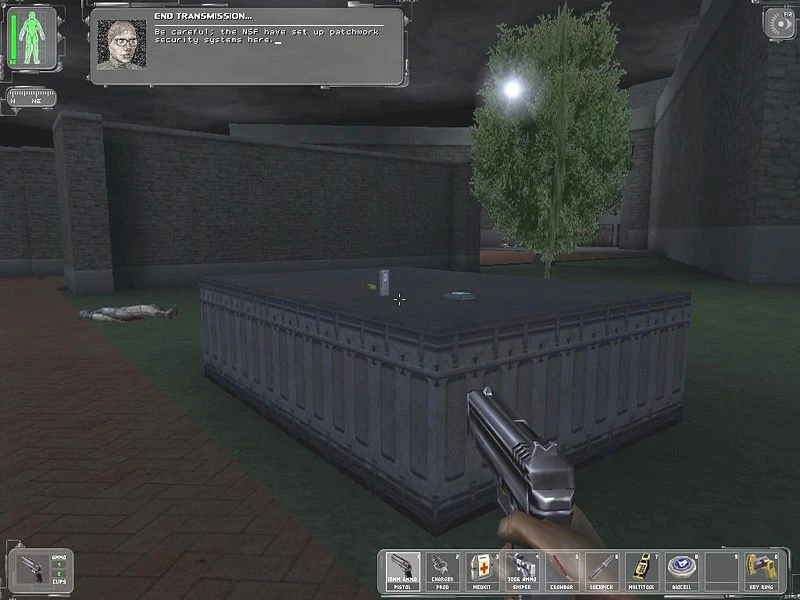
On top of the nearby container, you'll notice a datacube, a Prod Charger, and a Pepper Spray Cartridge. Read the datacube to find out that the login is NSF001 and the password smashthestate. From here, you can head in two directions: Straight ahead, to the front entrance of the statue complex, or right, to circle around it.
Storage bunker[]
From the container with the datacube and pepper gun, take a right and follow the dark, wide alley to the southeast, as you near a pile of crates, beware of a patrolling guard. Either eliminate or distract him. Once he's taken care of, break open the wooden crate for a multitool. Keep going eastwards, staying close to the statue wall, and you'll come across two terrorists talking about Gunther. Further ahead to the east are two terrorists under a streetlight. A third is patrolling near them, and a fourth is patrolling near some kind of storage facility to the north. You can avoid the first three - they're too far away to cause you any problems - and simply concentrate on neutralizing the fourth one to get him out of your way. Once that's done, sneak head into the storage bunker. There is one terrorist in here. Crouch behind a small wall on the right entrance. Then, when you notice the guard stop by the Hazmat suit, eliminate him with a riot prod or pistol. Ignore the Hazmat suit, climb the ladder on the crates and turn your light augmentation on to find a multitool, and continue around the corner.
Follow Alex's advice and don't cross through the arcs. Press the button on the forklift and quickly get on the fork, from here you can jump onto the power box and safely avoid the arcs. Collect the goodies in the crates (these include two weapon modifications) then use the metal crate to get back onto the powerbox, climb across it and back to safety. Getting past the electrical hazard will get you a large exploration bonus. Outside the bunker is another locked panel labeled "U.N.A.T.C.O. Medlab" that houses medbots.
North dock[]
Leaving the storage facility, head northwest towards the north dock. Don't worry about the bot. It's friendly (a fact which you may wish to exploit) but will only patrol this immediate vicinity. Go down the ramp to the north dock. Watch out for the two guards. The one dressed in black stands in one place on the right side of the crates, while the other patrols in a circular pattern. You can either eliminate them yourselves, or grab their attention and let the bot deal with them. Once they're taken care of, break the wooden crates open to find some rockets (for the GEP gun) and some 30.06 ammo. Continue down the dock and turn right, at the end on the left is another crate, break it open to find a medkit.
On the western side of the dock is a small shack where you will find a man named Harley Filben. Tell him you will not hurt the NSF commander and he will give you the key to the front docks and you will earn additional skill points. Talk to the drifter woman and she'll offer to sell you ammunition (30.06 Ammo for 300 credits, 10mm ammo for 175, and Darts for 50).
Now it's time to go for a dive. Go to the north edge of the dock and look down into the water. On the seabed you can see a sunken boat. You will need to crouch to get under the barrier to reach it. The hatch to the boat is locked. You can pick the lock (coming back up for air as needed), or use the explosive barrel near Filben's hut (push it into the water then hide behind something and shoot at it). Once you have it open, break open the three crates inside for a sawed-off shotgun and two weapon mods. If you have difficulty seeing the crates inside the boat, activate the light augmentation or use a flare. If you start to run out of breath you can return to the surface and come back again for what you missed. Entering the boat will also reward you an exploration bonus.
Entering the Statue of Liberty compound[]
The compound can be entered through either the front entrance or the rear entrance.
Going in the front way, though straightforward, has its hazards. A wheeled Security Bot patrols the area immediately in front of the statue, and there are also three or four terrorists nearby, one of which is especially dangerous as he is armed with a sniper rifle.
Front entrance[]
Exit the northern docks and head East, following the same path you took before. If you took the GEP Gun at the beginning, use it to destroy the bot from a distance (hold the crosshair over the target until the weapon beeps continuously, signaling that it is locked on, and then fire). Preferably, engage the bot when it is patrolling on the south side of its route to minimize the chance that the nearby terrorists will hear the explosion. Once the bot is taken care of, either neutralize the remaining terrorists or simply avoid them. There is a room in the center of this area with a locked chest containing ammo and a credit chit. If you go back to the right of the dock you started from and pick up one of the crates of TNT then you can throw it at the bot as it passes in front of the room with the chest. This will destroy the bot and open the chest. It will also damage your legs and draw the attention of any remaining enemies so some care is needed. If you are being chased, you can run back to UNATCO HQ or the dock to get some assistance killing the enemies. Then, you can go to the medbot to heal if necessary.
Head for the front doors. They're locked and the camera will set off the alarm if you stand in front of it, so stay out of its line of sight and move up to the security computer to the left of the doors. Log into it with the login and password you found in the datacube (NSF001/smashthestate) and turn off the camera and unlock the doors. Smash the crate nearby for a Lockpick and enter the lobby. If you draw attention, run out again and the turret will attack anyone who follows you.
Rear entrance[]
Climb back onto the dock and make your way back to the storage facility and the huge piles of crates and containers nearby. Climb the containers, using the ladders and small metal crates, and climb over the wall onto the outside of the statue complex. There are two guards patrolling to the south, you can engage them if you like but it's easier to avoid them. From here, go west until you run into another guard. Dispatch him, but watch out. There are two around the corner. You may want to lure them around the corner and then shoot the box of TNT as they pass it, but this is difficult to do reliably unless you invested most of your skills in pistol marksmanship. Once they're out of the way follow the two ramps up to the tower. Watch out, three of the four passages here are booby-trapped with gas grenades. Move in quickly and right click on them to defuse them before they go off - just like in training. Once that's done, quietly move into the center and listen as the two thugs nearby talk about "the shipment." You can dispatch them if you wish, but as long as you keep crouched and stay behind them you can just ignore them. Head downstairs, ignore the patrolling guard, and continue downwards in to the lobby. Behind the corner on the right is a security camera and a crate containing a lockpick. You can either disable the camera or evade it if you are quick enough. Take note of the gun turret on the roof, which will activate if an alarm is tripped.
Inside the Statue[]
Two guards patrol the lobby: one on the north balcony on the second floor who patrols east to west, and one on the ground floor who patrols counter-clockwise around the torch monument in the center. If you want to avoid the guards, you can simply crawl into a small vent that lies left of the stairs leading to the upper floors of the statue. Crawl through the vent until you notice a doorway on the left. Ignore this for now and pick up the multitool on the floor, before continuing on through the vent. Read the datacube on the desk to discover some bank account details (230023/4558) and pick up the Medkit.
Head back through the vent and through the doorway you ignored before to enter an empty room. Pick the door with a lockpick and wait until a patrolling guard passes. Eliminate the guard and pick up the LAM located under a small shelf before continuing on into the next room past the laser tripwires. In the room is a seated guard and a security camera and turret, both of which are controlled by a security terminal in the same room. Crawl behind the guard and either eliminate him, or quickly dash behind the desk he sits at. If you are careful, he will not notice you, allowing you to hack the security terminal (NSF001/smashthestate). Disable the security camera, unlock the door and if you wish use the turret to eliminate the guard. Be warned that using the turret will alert any other guards in the lobby who may trigger an alarm.
During your conversation with Gunther, you'll need to give him a weapon to maintain his favor (usually the pistol, you don't have a choice in the matter). If you've already applied some weapon modifications to your pistol and don't want to lose it, drop it before speaking to Gunther and you'll give him something else, like a knife. If you drop all of your weapons before talking to Gunther, JC will say something like "I'd like to help but I'm not very well armed myself" and you won't lose anything. This completes your secondary objective and will give you a skill points bonus and additional credits later on. Go back into the vent system you used before, ignoring or eliminating any guards along the way, before heading up the stairs to the top of the statue.
When talking to the Terrorist Leader, pick the second option
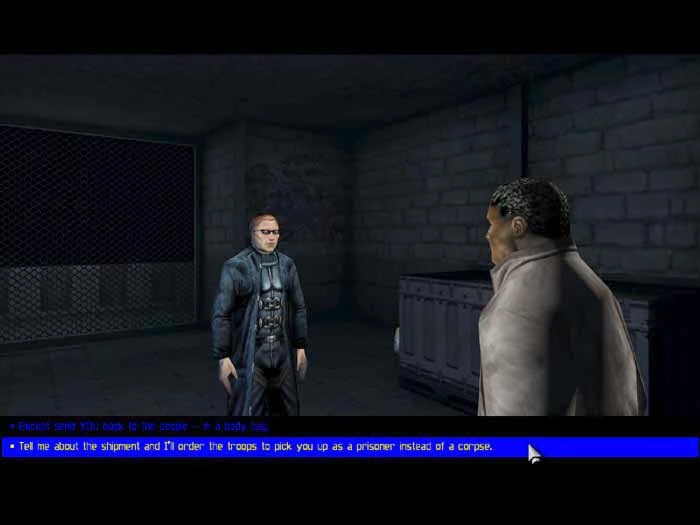
You'll come across two guards who will discuss the shipment (if you came through the front door) but will not pose a threat as long as you sneak past them. A few sets of stairs later, you will come across two more guards contemplating whether or not to hold their positions. Wait for them to finish their conversations, then sneak behind them and continue on until you find the terrorist leader, Leo Gold.
When given a choice during the conversation, choose the second option or he'll take offense and attack you, forcing you to kill him, a state of affairs which leads to some disdain from your boss and should be avoided. When the conversation is over, a friendly trooper will show up claiming they've secured the area. This completes the first part of the mission.
Talk to Leo again to hear some more of what he has to say, and when you're done, pick up the augmentation canister on the crates beside him. If you wish, kill the UNATCO guard that will show up for a free Assault Rifle and a humorous response from Manderley.
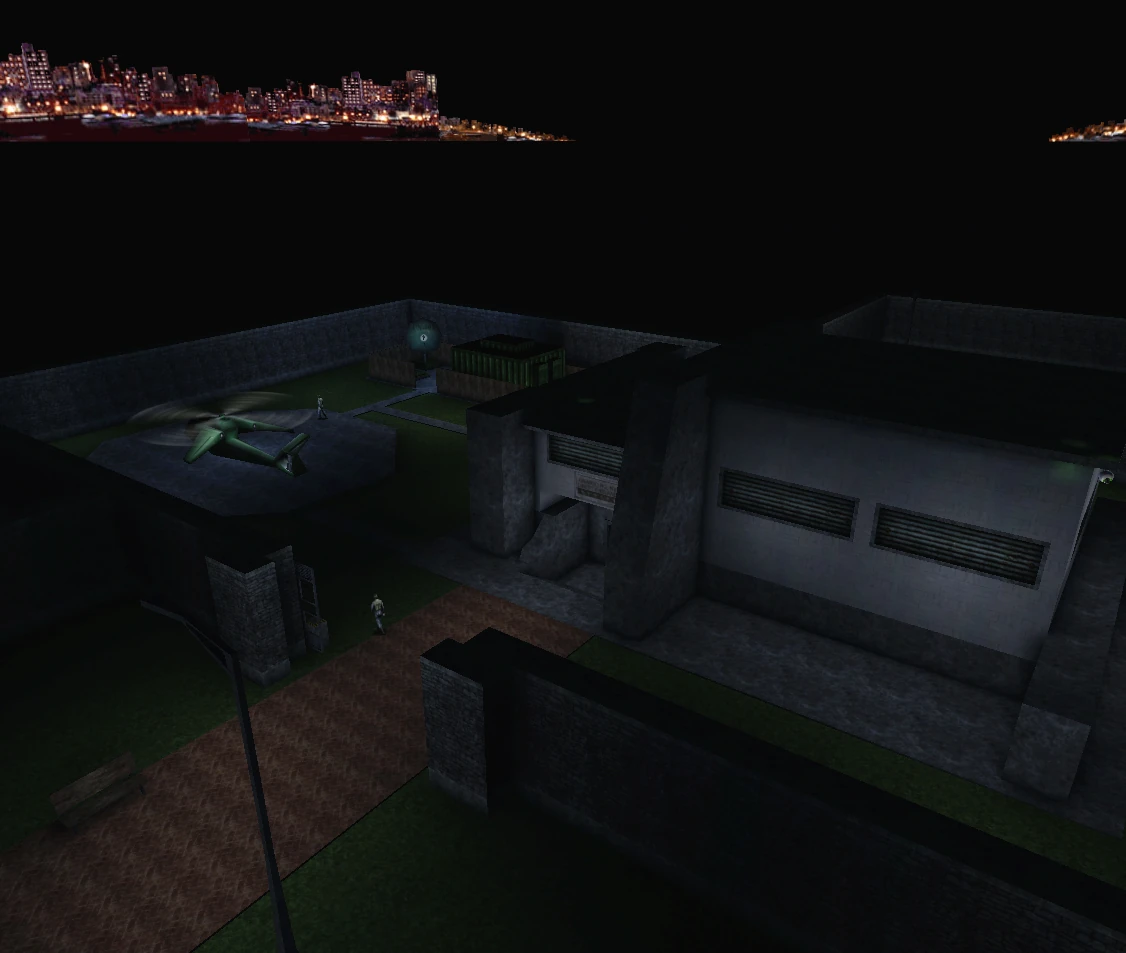
UNATCO HQ[]
UNATCO HQ
Go back to UNATCO HQ, chatting with the troopers on the way, and talk to Paul. He will praise or scold your handling of the situation depending on your actions. Continue through the front doors, talk to Private Lloyd, and enter the building. Within the HQ, you are given the introduction to your base. You can use the retinal scanner go through the door and explore the base. On level one there are two locked office doors, one to the left and one on the right. Ignore them for now.
You will need to see Joseph Manderley on level two. His office has a personal secretary, Janice Reed, who will give you the login and password to your UNATCO computer. Also, on her desk is a NanoKey, which unlocks two doors nearby, as well as a DataCube with Manderley's computer login details.
After an introduction to your superior officer, he will recommend you check in with Sam Carter in the armory (for equipment) and Jaime Reyes in Medical on level three. The doctor, Jaime Reyes, will give a brief description on how the augmentations work, and checks if you found one. On a bookshelf by Jaime's computer is a NanoKey behind a small plant, pick it up and use it to open the nearby medical closet. Inside are crates containing some medkits. Also in his office is a medbot which will heal you and install any augmentations you have found. There is also passage to level 4, a secure area.
The quartermaster, Sam Carter, located on level three, will give you a Stealth Pistol. This weapon is silenced, and thus won't alert enemies if the weapon is fired (however, the "death scream" an enemy gives off will usually alert enemies anyway). You also have a choice of a lockpick, multitool or additional ammo. You may choose any of the three items. Take your time to visit the other places within the floor. Alex Jacobson is located in the Computer Ops room in the north-east section of the base. In his e-mail box is a list of passwords for every person at UNATCO. Open the closest door using the code 2001, found via Alex's computer. Break open the crates inside for a lockpick and a biocell. There is also a hidden floor panel in the Computer Ops room (directly opposite a DataCube), containing a scope weapon modification, 30.06 ammo, and an office door key for the locked offices on the first floor (mentioned earlier). Unlock them to find an accuracy mod and NanoKey in the one, and a lockpick and multitool inside the other.
If you wish, enter the woman's bathroom for some humorous results and scolding from Manderley, but otherwise continue back upstairs. Enter your office for information about UNATCO, as well as to check your e-mail. Nearby is the breakroom, where you can hack an ATM for cash and overhear a conversation that almost every Deus Ex player will know. I wanted orange... it gave me lemon-lime.
Return to Manderley's office to be briefed on the next mission. You will need to head to Battery Park to retrieve a barrel of ambrosia, and afterward take down the generator of a NSF warehouse. You will receive an op bonus of 1000 (or 800 if you killed the NSF commander), and an additional 250 credits for rescuing Agent Hermann. You will also receive other reprimands, including the one caused if you enter the women's bathroom. If you don't have one already, take the candy bar inside Manderley's bathroom, since you can use it in the next mission.
Return to the surface, collect anything you missed, and head for the boat. Once you leave, you will not be able to explore Liberty Island again.
Notes[]
- Killing or stunning the custody trooper yields an Assault rifle. Doing so will add lines about this to Manderley's debriefing but no penalties will occur.
- If a fight takes place too close to the HQ, Private Lloyd will investigate and open the locked door. This allows a player to bypass the entire mission and still get the op bonus for keeping Leo Gold alive as Manderley only checks whether Reyes and Carter were talked to before giving the final debriefing.